Breakfast, lunch and dinner, from garden, kitchen and restaurant,
great grub abounds in the Ozarks and at Moonmooring!

Visit Moonmooring

great grub abounds in the Ozarks and at Moonmooring!
Visit Moonmooring
 This year’s first turkey dinner was a surprise. There is something to be said for the spectacular task of preparing and presenting a twenty-four pound turkey to the dinner table. But I digress as it has been many years since a turkey of those proportions has been roasted by me. No, this year’s bird was a mere 16 pounds. Perfect.
Gene – aka Honey Bun – acquired a fairly local free range turkey from Peace Valley Poultry (as he has in the past) and brought it home fresh yesterday just hours after being butchered and chilled.
Now a big ole turkey has become somewhat intimidating to me. For so many years the turkey would take up this huge space in the fridge or freezer until baking time and it just confounded me. Some years we would ask the butcher to cut it in half, and would roast one half for turkey feasting and save the second half for mid summer fare. Regardless, it would take up too darn much room in the freezer. If the whole bird or even half the bird was baked then there were all those leftovers…of which I LOVED for several days. There is nothing to compare with a big fat white meat sandwich on lightly toasted whole wheat bread slathered with mayo (and by that I mean Miracle Whip, but that ingredient no longer graces my kitchen) heavy on the salt and pepper. Pickles on the side.
But if there was enough turkey left over to require freezing the cooked meat then I wanted nothing to do with it. I simply loathe frozen cooked turkey. It does not seem to me fit for consumption. Yuk.
So Gene and I had many long conversations about whether or not to even get a turkey. We are expecting no company this year. Etc.
Gene happened upon the brilliant idea of cutting the big bird up (not to be confused with THE Big Bird) just like you would a chicken for frying, wrapping each piece individually and then freezing those pieces. I LOVED the idea. And we did just that. But not until after we had drank our coffee and steeled ourselves to trash the kitchen.
I realized how much space the bony pieces would take up in the freezer so we decided to roast them. This included the back, breast bone, wing tips, and neck. Well heck if we were going to go to that much trouble we might as well add a few potatoes and some carrots. And how about onion, celery, garlic cloves and don’t forget the rosemary, sage and a bit of fresh parsley. Some cracked black pepper and that last clump of cabbage.
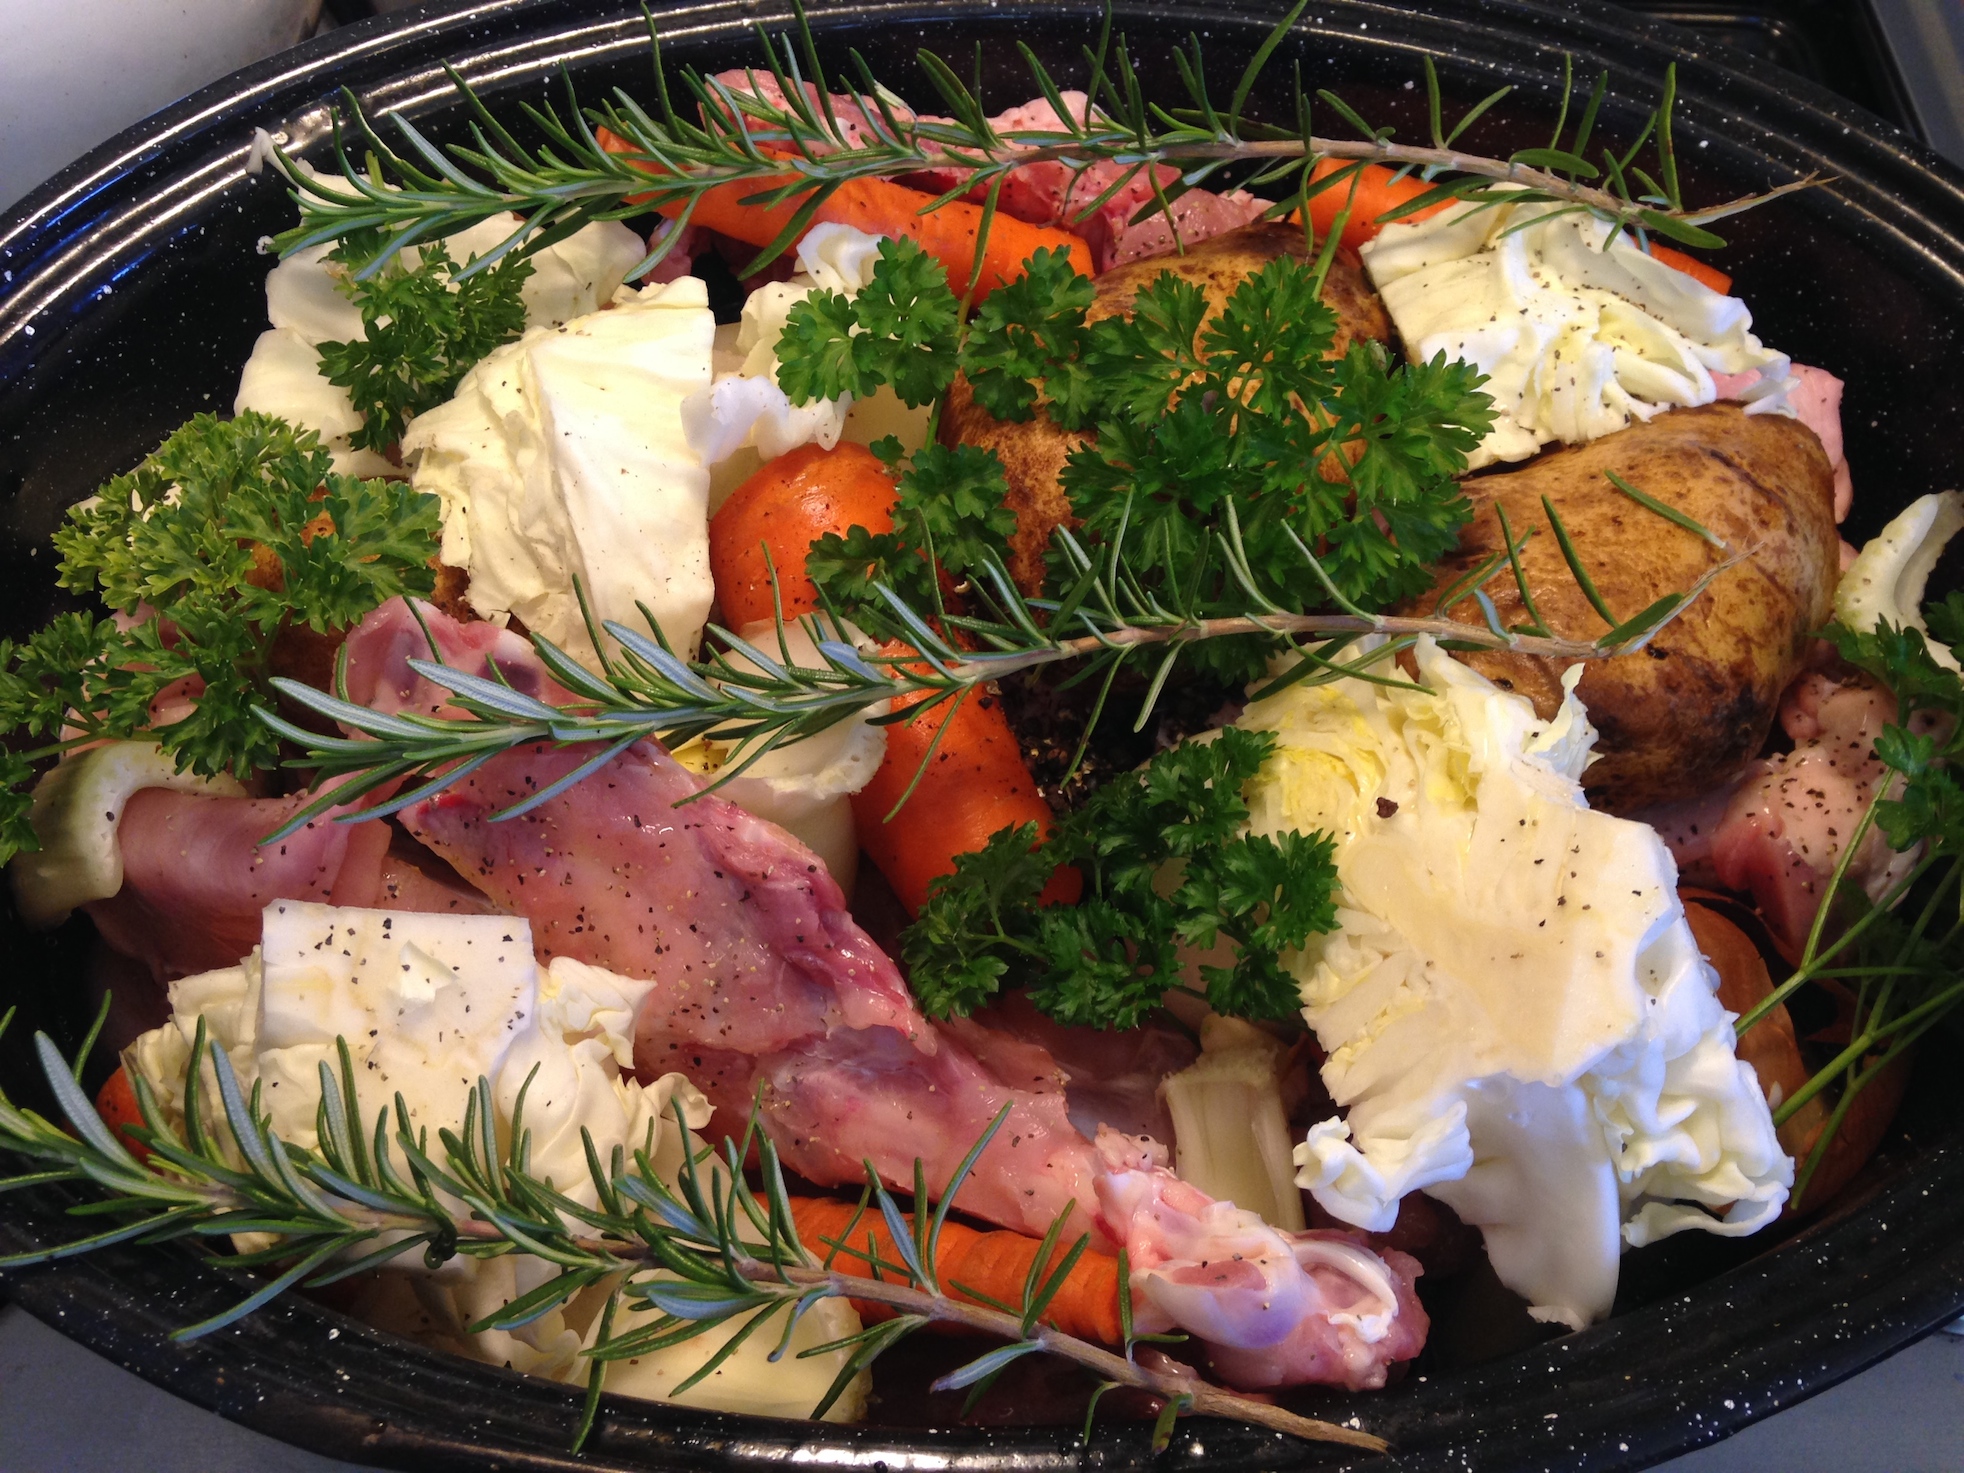
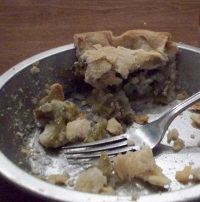
Bony pieces of turkey with scrappy vegetables ready for the oven
You may get the picture by now. We were suddenly roasting a turkey meal and leaving yesterday’s planned leftovers for another day.
Best. Dang. Turkey. Meal. Ever!

In my opinion – the bony pieces are the very best of the bird – slow roasted with plenty of garlic, rosemary and black pepper. A splash of olive oil, a squeeze of lemon and a few cups of water will make for a delicious broth
So we had our first turkey meal of this holiday season for late lunch and it was good. If only I had remembered the cranberry sauce.
And right now at this very minute the bones and scrappy bits are simmering in a pot to make broth for soup. By now it is so late in the day that I am going to be tuckered out by the time the broth is cool enough to handle, strain, and chilled enough for the fridge.
This next part is an old favorite of mine. The broth, pot and all, will get set out in the garden overnight (because there is a fence) to chill. The temperature will be just below freezing and the soup will chill quickly. In the morning I can skim the fat (or not) and either make soup or can the stock for later.
Life is good. And my turkyphobia is gone. Having ten neat packages of great turkey wrapped and in the freezer for reasonably sized meals seems so much easier to deal with than a giant carcass!
 And many happy holiday meals to you!
This passing summer has seen a garden of amazing abundance – more than we could ever have hoped for. It was on a piece of ground that had not been tilled in many years. Everything we planted went in quite late, some just at the cusp of what might produce for the season. In spite of all that seemingly went wrong, everything went right.

This mornings harvest. I keep thinking it will be the last! But no. Still to come, sweet potatoes and LOTS of peppers. Today we have beans, Ping Tung, baby zucchini, green and ripe tomatoes (several varieties) and five varieties of peppers.
We even had an amazing (obligatory) volunteer squash which has been tentatively called several things. Buttershaw, Nutcup, and Frankensquash were but a few suggestions. These squash produced mostly near basketball size fruits nicely shaped like a Buttercup. The color of the shell very similar to last years Cushaw and the inside brilliant orange like a Butternut. Buttershaw seems most apropos. There were a few perfectly shaped like Butternut but I haven’t opened any of them to inspect the contents.

Yesterdays peppers and a stray watermelon that had been hiding.
I can only hope this to be near the last harvest! There are still scads of peppers, a few tomatoes and the sweet potatoes to harvest.

The last of the mystery squash, named Nutcup.
I swear I am not cooking one more tomato this season! So much abundance this year! I’ve resorted to pureeing, cooking and freezing the last of the yellow tomatoes. They aren’t good candidates for canning because of low acidity, unless you pressure can them.

We grew three varieties of yellow tomatoes this year, the largest Mr. Stripey which will turn a deep beautiful orange, Garden Peach which is about as yellow as it gets and Isis Candy, a cherry tomato that varies from a golden yellow to burnt orange.

A small Mr. Stripey on top. They will easily get to the size of a beefsteak. The lower tomato is an Isis Candy. Both yummy!

The yellow tomato sauce coming to a simmer.
What to do with yellow tomato sauce? Use it for rice and vegetable dishes. Add potatoes, especially the golden varieties. Adding red chili powders for Mexican dishes will give you a beautiful rusty orange color. I have used it for pasta sauce and it is delightfully tasty. I did not find the color off putting but I can imagine some might. Saffron is a great spice to use with the yellows.
Whatever you do, explore food varieties and tastes. Happy cooking!
![]()
Today’s lunch came directly from my garden to the kitchen, to the pan and then my tummy. It had been picked less than an hour when I was stuffing myself – with reverence of course!

Freshly picked and ready to slice
All told there was zucchini, green beans, okra, eggplant, green tomato, new potatoes, and peppers. It all started off with the cucumbers though.

Sliced on a diagonal, topped with cream cheese and a dab of my favorite homemade pepper jam this was a great appetizer to start with
I melted some coconut oil in a large skillet then prepped the veggies. The okra and green beans were left whole. But the potato, zucchini, eggplant and green tomato were sliced thick. I chunked the beautiful round orange pepper.

The prepped veggies
Each piece of vegetable was dipped in country fresh egg then a mixture of course ground organic cornmeal and whole wheat flour. I carefully laid each breaded piece in the hot oil and browned till crispy on the outside and barely tender on the inside. A mixture of mayo or Miracle Whip (I know…) and prepared horseradish is my condiment of choice for fried vegetables.

Starting at the bottom and going clockwise; green tomato, zucchini, potato, the lone okra, eggplant, green beans and the peppers
 I paired this hearty meal with my new favorite beverage, Angry Orchard’s hard cider, Apple Ginger. Yum!
Spanish rice is a long time favorite in my family. We can trace it back six generations. The seventh generation of Spanish rice eaters isn’t old enough to cook yet but they sure do enjoy it! Everyone alive now who makes it has their own twist. My mother likes it soupy and with a lot of tomatoes. My brother makes it even more tomato-y. My Aunt Zoma created a Spanish rice that was yellow, without tomatoes. I failed to get Aunt Zoma’s recipe before she died and regret that. I haven’t had my sister’s rice in so many years I have no idea what she does.
The point it this; my great-grandmother Lydia Boren travelled to California as a young girl in a wagon train with her family. There her mother learned to make Spanish rice and it was handed down to Lydia, then to her daughter Thelma Boren Hargett Dall, and her daughters, Eunice, Zoma, Odessa, and Nona, then on to my generation of cooks, our children and my sister’s grandchildren. It’s a family tradition with all my known cousins – first, second and third.
I prefer my Spanish rice with venison, plenty of garlic, light on the tomatoes, chicken broth is nice and bone dry with long grain rice. Plenty of heat.
This recipe is a guideline. There are plenty of options to choose from as you see with most of my recipes. Take all the liberties you want!
1 lb. ground meat
4 to 5 Tbls. oil
1 C. white rice, long grain
1 or 2 large green bell peppers
1 medium onion
1 stalk celery
3 cloves garlic
8 ounces canned tomato sauce
salt, pepper, cumin, chili powder
Brown the ground meat in a skillet and drain off any liquid. Meanwhile chop the onion, peppers and celery in bite size pieces. Mince the garlic.
Heat the oil in a larger skillet. Add the rice. Bring heat up till the rice sizzles slightly and adjust heat so it doesn’t burn. Keep the bottom of the pan covered evenly with the rice so it will toast or brown. Stir frequently. Do not burn the rice! If you do burn the rice throw it out and start over. This takes a bit of patience.
Once the rice is browned, add a good splash of oil, turn the heat up a few notches and toss in the onion, peppers and celery. Stir and cook until the vegetables just start to get limp, Add the garlic and cook for about 30 seconds more. Immediately pour in the tomato sauce and 1 cup of water, add the cooked and drained meat. Stir to mix. Add the spices. Bring to a low simmer. Cover with a tight lid and cook about 15 minutes on low. Check the rice for doneness. Let sit with the lid on for an additional 5 to 10 minutes to finish cooking.
How I have tweaked my Spanish Rice recipe
2 Tbls. lard or tallow to brown the venison in
1 lb. ground venison, or hamburger
4 to 5 Tbls. oil
1 cup white rice, long grain
3 or 4 large sweet peppers, any variety
1 large onion
2 stalk celery
4 cloves garlic
1 – 16 ounce jar of home-made salsa or tomato sauce
salt, pepper, 1 tsp. cumin, 2 tsp. chili powder
Use the same method as above for cooking.
NOTES
Any ground meat is fine, short or long grain rice will work, use your favorite oil, don’t worry about the exact amount of vegetables – use what you have. Tomato product – can be anything from commercially canned sauce to freshly chopped raw tomatoes. I have even used tomato juice or V-8 when that was all I had on hand. I suppose you could use a can of tomato soup if you wanted. Vary the amount of cumin and chili powder to your liking. Cumin is an acquired taste for some people. Leave it out if you don’t agree with it.
Most importantly – have fun with your cooking! Don’t be afraid to adjust the recipe. If something is critical I will tell you. Don’t burn the rice OR the roux! That is critical.
Vietnamese in St. Louis. Yes. It was my first time for this cuisine. The last new exotic Ethnic food was Ethiopian and it is still my favorite. The Vietnamese was fresh, light and delicious!

We started with Ga Xe Phay, slivered cabbage, shrimp, chicken, lime, cilantro, peanuts, sesame seeds and a light sweet dressing.

Then we had Ca Ri Ga and Dau Xao Toi.
The Ca Ri Ga is a traditional yellow curry with potatoes and carrots. Lots of cilantro and lime juice and something hot. Maybe Thai chilies? I accidentally used too many Thai chilies in a pot of chili one time. It was deadly hot!
The Dau Xao Toi is seared green beans in a black bean sauce. It was marvelous.
I have nothing to compare with this restaurant but it was good enough that I would return to try more entrees. So, next time you are in St. Louis check out Little Saigon on Euclid.
 In a hurry today, I took advantage of a few leftovers in the fridge – a few fat slices of garden ripe tomatoes and a meal was born.
The recipe;
Beef and Noodles
1 Tbls. coconut oil
1 small onion, chopped
1 mild pepper (red or green), chopped
8 ounces leftover steak, sliced thin
2 – 3 cloves garlic, smashed
3 handfuls of egg noodles, cooked according to package direction, drained
1/2 head broccoli, cut in flowerets and steamed about 6 minutes, drained
1 can Cream of Chicken or mushroom or celery soup
6 – 8 ounces mushrooms, sliced
Cook the noodles and drain. Cook the broccoli and drain.
Melt the oil in a skillet. Saute the peppers and onions a couple of minutes. Add the sliced steak to heat. Add the garlic and cook about one more minute. Add the soup plus about one cup water or milk. Cook and stir untill bubbly. Add the mushrooms and cook for about two minutes. Add the noodles and broccoli. Heat through. Serve with sliced tomatoes or a salad.
This makes two REALLY hearty serving or 3 – 4 small servings.
My reality…I had a jar of leftover Chicken Divan sauce and used that instead of the canned soup. I also forgot the garlic. I can’t imagine cooking this without garlic, but it happened. It was really good in spite of that.
Ya’all enjoy!
I love pesto! Many of my friends love my pesto. Today finds me making pesto for the third time this season. There could be a big ole discussion on growing and harvesting pesto to maximise your efforts etc. But you know what? I don’t have time today. And we are way past that point anyway. Maybe later then.
I have twenty-two Genovese basil plants and fifteen Thai basil plants. I’ve harvested the Genovese three times not counting the random pickings here and there to season something. The Thai basil went in really late. Later than all the other late stuff this year. I have not harvested it yet although I have plucked the ends off enough to force it to branch a couple of times. I expect a harvest will be coming soon.
You can see comprehensive visuals here, at Moonmooring, that I photographed in 2009. I am a much improved photographer since then! The pesto is still ‘da bomb! So check out those pics and here are some more to encourage you along your own pesto excursion.

About half of todays harvest drying off after a good rinse.

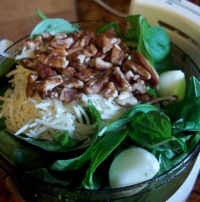
The food processor filled with basil, olive oil, parmesan cheese, pecans and garlic

This is one of those big Tupperware bowls filling up with batches of pesto.

The finished product. I like to use jars ranging in size from 4 ounce to one pint. I always have the right size depending on the circumstances.
When making pesto – work fast! Pick the top branches of each branch leaving a bilateral leaf so it will split and grow more. Make sure the pesto has been watered well for a few days prior to harvesting. Pick about one or two hours after the sun hits the leaves to bring the oils to maturity. Waiting until late in the day on a sunny day will give you limp leaves – try to avoid that if you can.
Rinse the basil leaves well checking for little spiders, slugs and other assorted bugs that might be hiding in this aroma den. Shake excess water from leaves. Drain and lay out on absorbent towels to dry. I have used my Pampered Chef salad spinner and it works well for small to medium amounts of basil. Today’s was an especially large harvest. After I laid it all out to dry on towels I put a small fan on the counter to gently speed the drying time. That was a good idea – thank you Marideth Sisco.
When processing multiple batches (I had five large food processor batches today) place each finished batch in a large bowl and stir them all together for uniformity. Taste once in a while and tweak your garlic , cheese and nuts if need be.
Jar up in straight sided jars or freezer jars. Use a table knife and run it around the edges and sides to remove air pockets. Air will make the pesto oxidize and it will turn dark faster. Mash each jars contents down flat with the back of a spoon and top with a thin layer of olive oil to seal out the air. Freeze in an upright position. This will keep all winter and still be delightful!
I expect to put up about thirty half pints this summer. Some of this will go to friends and we will eat most of it. It makes a great pot luck dish! Just pour a jar over hot cooked pasta for a quick delicious meal or have it with your favorite crunchy vegetables and crackers!
I’ve been wanting to make fresh pasta for years. Here is a perfect go at it – for me anyway. Now where is that pasta machine… yes I think there is one laying around somewhere.


| S on Turkey Surprise | |
| Tauni Whitley on Turkey Surprise | |
| S on Lunch Fresh From The Gard… | |
| Carol Taylor on Lunch Fresh From The Gard… | |
| yarnspinnerpress on Lunch Fresh From The Gard… | |
| S on Lunch Fresh From The Gard… | |
| DElicious Leftovers… on Chicken Divan | |
| Breakfast Was Leftov… on Fried Green Tomatoes | |
| S on Fried Green Tomatoes | |
| Gene Weinbeck on Fried Green Tomatoes |